Pages

Thursday, December 29, 2011

Sasha's Kitchen: Magnolia Bakery's Chocolate Chip Cookies


Magnolia Bakery is one of New York's most famous bakeries and also one of my favorites.  Recently, I stopped by and picked up a copy of the Magnolia Bakery Cookbook, which I am so excited to explore.  So far I have made two recipes - I made Magnolia's chocolate chip cookies and I made their famous banana pudding, both of which were delicious.  I plan to make their apple walnut cake with cream cheese caramel frosting for New Years and explore some new baking recipes, including cupcakes, in January.  As I mentioned in a recent post, I received a whole box of baking supplies from ShopRite, which is right up my sleeve since I LOVE TO BAKE!  I figured chocolate chip cookies were another perfect recipe for using all of these goodies.  These were the best chocolate chip cookies I've made yet - chewy and chocolate-ey just like I like them.  The combination of brown sugar and granulated sugar is the trick that makes the cookie what it is.  Be sure to bake the cookies only the time allotted, even if they seem soft when they come out of the oven. They continue cooking after they come out of the oven and will be just perfect after 12 minutes or so in the oven, once they cool.  I used the brown sugar, sugar, vanilla, chocolate chips and flour that ShopRite sent me in this recipe.

Magnolia Bakery's Chocolate Chip Cookies
1 1/2 cups all purpose flour
1 tsp baking soda
1/2 tsp salt
1 1/2 sticks unsalted butter
1/2 cup granulated sugar
1/2 cup light brown sugar
1 large egg
1 tsp vanilla extract
1/2 cup chocolate chips


Preheat the oven to 350.  In a large bowl, combine the flour, baking soda, and salt.  In your stand mixer, cream the butter and the sugars for three minutes until smooth.  Beat in the egg and vanilla and mix well.  Add in the flour mixture and mix thoroughly, and then stir in the chocolate chips.  Drop well rounded, heaping teaspoonfuls of cookie dough onto cookies sheets lined with parchment paper, leaving space for expansion.  Bake 10-12 minutes, one sheet at a time, in the center of your oven until lightly golden brown.

Tuesday, December 27, 2011

Sasha's Kitchen: Chipotle Rubbed Flank Steak with Corn-Avocado Salsa


I made this delicious steak recently, on Christmas Eve for our stay at home boring Jewish Christmas.  The meal was surprisingly easy and delicious.  The one thing I didn't anticipate was how smoky grilling a chipotle rubbed steak is - it made the kitchen very smoky! The resulting flavor was a little but on the spicy side, but very flavorful and went nicely with the corn and avocado salsa.  This would be a great summertime dish made on an outdoor grill as well, although I obviously made it indoors in a grill pan.

Sasha's Chipotle Rubbed Flank Steak with Corn-Avocado Salsa
One 1/2 lb flank steak
2/3 cup orange juice
3 canned chipotle peppers in adobo
2 diced cloves of garlic
2 T olive oil
1 cup corn
2 avocados, peeled and chopped
1 T lime juice
1/2 small jalapeno pepper, seeded and diced
1/4 cup minced red onion

In a blender, combine the chipotle peppers, orange juice, olive oil and garlic and puree.  Marinate the steak for ten minutes.  Remove the steak from the marinade and let the excess drip off but don't wash off the marinade.  Grill as desired in your grill pan or outdoor grill on both sides.

In a separate bowl, combine the corn, avocado, lime juice, jalapeno and red onion and serve on top of the flank steak as salsa.

Saturday, December 24, 2011

Sasha's Kitchen: Chocolate Coconut Snowman Cupcakes


As you know, I love to bake and can never resist a new baking project.  I received a box full of wonderful baking supplies from ShopRite for use in some holiday baking, as my December installment of goodies for the ShopRite Potluck blog panel. Yay for sugar, flour, coconut, vanilla, nuts, and oodles of chocolate! For the first project using the new box of baking supplies, I made some chocolate coconut cupcakes, because the coconut from ShopRite seemed a perfect surrogate for snow, which is always in my thought this time of year.  Last year, at this time, of course, New York was paralyzed by the big blizzard!  At any rate, I created some lovely chocolate coconut cupcakes that were deliccious, using a vanilla buttercream under the top layer of coconut.  And for a seasonal twist, I added fondant snowmen to some of the cupcakes for decoration. What coudl be cute?  Happy Holidays!


Sasha's Chocolate Coconut Cupcakes
1 1/4 cups ShopRite's all purpose flour
1/2 cup ShopRite's unsweetened cocoa powder
3/4 tsp baking powder
1/4 tsp salt
1 cup ShopRite's granulated sugar
1/3 cup vegetable oil
1 egg
1 tsp ShopRite's vanilla extract
3/4 cup milk

Frosting
1 stick unsalted butter
3 cups ShopRite's confectioner's sugar
1 tsp ShopRite's vanilla extract
2 T heavy cream
Dip in ShopRite's sweetened shredded coconut
Fondant snowman, created using fondant and gel food colors to dye the fondant.

Combine the dry ingredients for the cupcakes in a bowl.  Beat the egg and oilve oil with the sugar and vanilla.  Altnerate adding the dry ingredients and the milk until combined.  Fill cupcake liners 3/4 full in a silicon cupcake tray and bake at 350 for 25 minutes, until a toothpick comes out clean. Allow to cool completely before frosting.


Beat the butter until smooth for three minutes in a stand mixer.  Beat in the vanilla and confectioenr's sugar until it forms a smooth frosting and slowly add in the heavy cream.  Frost the cupcake with a spatula and dip in shredded coconut.  Top with a fondant created snowman and serve.  Happy holidays and here's for some pretty white snow.

Tuesday, December 20, 2011

Sasha's Kitchen: Ricotta, Pomegranate & Honey Dessert Eggrolls


I made these delicious dessert eggrolls after making a similar recipe in my recent Chinese dumpling class.  They are really good as long as you learn how to roll the eggroll wrappers, which os actually quite easy.  The only problem is that the recipe makes a whole batch of them so they're really better for a dinner party when you have  large group to serve so the extras don't go to waste, since they don't hold up.  This is a fun take on a chinese eggroll and you can vary up the chocolate and fruit in the filling to make your own creation.

Sasha's Dessert Eggrolls
15 oz ricotta cheese
1/4 cup honey
1/2 cup white chocolate chips
1/2 cup pomegranate seeds
eggroll wrappers
1/2 cup fo confectioner's sugar


Mix the ingredients for the filling (the ricotta, pomegranate, chocolate chips and honey).  Place a large dollop in the center of an eggroll wrapper.  With the corner facing you, roll on a diagonal, folding in the sides to make an eggroll.  At the end of the rolling process, seal the tip with a couple drops of water. Then pan fry the eggrolls until brown in canola oil.  Using a strainer, dust with the confectioner's sugar before serving warm.

Saturday, December 17, 2011

Sasha's Kitchen: Mario Batali's Mint Love Letters (Ravioli)


Mario Batali's Babbo is one of my favorite Italian restaurants in New York.  Once when I was there about five years ago, we were seated a table away from U2 Frontman Bono and his entourage, which was pretty cool.  The food there is amazing.  One of my favorite dishes on the menu is a dish called mint love letters, which is a triangular shaped ravioli filled with a cheese, mint and sweet pea filling, served with a lamb ragu pasta sauce.  I've been wanting to make a regular ravioli version of this dish for awhile, since I make my own ravioli at home (such a rewarding process!).  I made the mint love letters square shaped, rather than triangular because it was easier to use my ravioli press.  This turned out to be one of my husband's favorite dinners and it's been requested again for next week since we already ate the two dozen raviolis I made in the original batch (yay for leftovers).  Making your own ravioli at home is fun and rewarding, although it does require a little bit of work.  This was one of my best ones yet.  Sorry the only pictures I have are of the final product and none of the lovely filling.

These were made last weekend, not last night, as yesterday my husband and I went out to a fondue restaurant in the East Village (The Bourgeois Pig) for my birthday!

Mario Batali's Mint Love Letter Ravioli (adapted from this recipe)
Filling
kosher salt
1 cup shelled sweet peas (I used frozen ones)
2 cups mint leaves
1 cup parmesan cheese, grated
1/2 cup heavy cream
fresh pepper

Ravioli dough (my perfected formula)
3 1/2 cups all purpose flour
5 eggs
1/2 tsp salt

Sauce
1 spanish onion, diced
2 28 oz cans peeled whole tomatoes, or tomato puree
1/2 of a peeled carrot
thyme
pepper
oregano
1 lb spicy lamb sausage


First, prepare the ravioli dough.  Beat the eggs, and then add the flour and salt all at once and beat into a dough.  You may have to bring the dough together with your hands to form four balls.  Wrap each ball in plastic wrap and allow to rest for half an hour either in your refrigerator or at room temperature.

Prepare the filling by first bringing three quarts of water to boil and adding a teaspoon salt.  Submerge the peas and cook for 1-2 minutes until tender yet still bright green.  Remove using a slotted spoon or hand strainer, saving the boiling water.  Set the peas aside and blanch the mint in the hot water for 30 seconds, before removing. Once removed transfer the peas and mint to an ice bath.  Drain well.  Then puree the peas and mint in your blender (we just got a new one after ours broke, sadly).  Add the parmesan cheese and heavy cream and pulse to form a paste.


Roll out the pasta dough to the desired thickness using your pasta machine.  You can make squqare shapes using a ravioli press like I did, or you can cut out squares in a knife and fold into triangular dumplings, like the mint love letters recipe suggests. Allow to dry on a drying rack, and then freeze.

Prepare a basic pasta sauce, like mine above, or like Mario Baltali's basic pasta sauce, and bring to a simmer.  Cook the lamb sausage in small pieces using canola oil, and add to the sauce.  Serve the mint love letters with the lamb sausage pasta sauce.

Thursday, December 15, 2011

Sasha's Kitchen: Beef Dumplings with Napa Cabbage


In my last post, I wrote about my Chinese dumpling class.  The recipe below is a variation on the beef dumplings we made in the class to my specifications.  I was able to replicate the nicely pleated fold to make the dumplings and taught my husband Brad how to do it as well.  He had fun joining me making dumplings last weekend.  This was a great meal - the filling was absolutely delicious and packed with flavor in every bite.  We pan fried the dumplings and they came out perfectly.  I'm so glad I have this new cuisine to add to my repertoire.  I think I'll be making dumplings quite frequently.  Next up, I plan on making veal/kimchi dumplings next weekend.


Sasha's Beef Dumplings
1 package circular dumpling wrappers
1 lb lean ground beef
3 cups diced napa cabbage
4 T low sodium soy sauce
2 T black vinegar
1 T sesame oil
4 scallions, diced
1 T diced garlic
1 T diced ginger

Mix all of the ingredients below for the filling with your hands, until well combined.  Put a small amount in each dumpling wrapper and fold dumplings. I can't really explain how to fold a dumpling in writing, so I guess you just have to already know how do do that.


To pan fry the dumplings, the following website provides a great primer on how to pan fry.  Line the finished dumplings on parchment paper before cooking so they don't stick.  Coat the bottom of a non stick pan with a couple tablespoons of canola oil.  Line the dumplings in the pan, crowded, smooth side down and cook over heat for two to three minutes.  Add about a half inch of water, cover with a lid and allow to cook for four to five minutes until the water is gone.  Then, remove the lid and flip the dumplings and cook another three minutes until nicely browned.

Tuesday, December 13, 2011

Sasha's Kitchen: Dumplings!


Recently I took a Chinese Dumpling making class one Sunday at the Brooklyn Kitchen in Williamsburg.  The class was an excellent class taught by Connie Sun of Bite Size Kitchen where I learned tons of useful dumpling making tricks.  I learned some great recipes for Chinese style fillings, and most importantly, several techniques for folding dumplings.  Last night, Brad and I made Chinese style beef dumplings, which we pan fried, and were delicious, and next week I plan on making veal/kimchi dumplings as well.  So this is the first of a series of posts on dumplings that I plan on posting, as I'll be sharing the recipes for the dumplings I'm making these days soon. Here are some pictures of the dumpling making experience from my class.  Oh, and also check out my latest product review from ShopRite on their blog panel Potluck!


Delicious dumpling fillings for the beef dumplings with Napa cabbage and the kimchi dumplings

A nicely folded dumpling, complete with the pleats


two folding styles of dumplings, ready to be pan fried

dumplings being steamed


My first folded dumpling


Dumplings galore!

Filling for dessert eggrolls - ricotta, honey, pomegranate seeds and chocolate chips

Dessert eggrolls

Sunday, December 11, 2011

Sasha's Kitchen: Big Lebowski White Russian Cupcakes


The Dude would have definitely been a fan one one of these cupcakes.  The Big Lebowski is one of my husband Brad's favorite movies.  Bowling and white russians (the Dude's favorite drink) play a central role in the movie, as well as the rug that "brings the room together."  So it made perfect sense to create a white russian flavored cupcake that was themed from the Big Lebowski.  I haven't made cupcakes in awhile, so it was fun to make a batch.  The cupcakes are flavored with Kahlua and instant coffee granules, while I made a Kahlua flavored frosting. For the Big Lebowski bowling feel, I decorated the cupcakes with purple glitz (sugar crystals) reminiscent of a bowling alley, and added some fondant bowling balls and pins.

White Russian Cupcakes
(adapted from Julie Hasson)
1 cup all-purpose flour
1/2 tsp baking powder
1/4 tsp baking soda
pinch salt
1/3 cup Kahlua
2 tsp instant coffee granules
3/4 cup sugar
1 stick butter at room temperature
2 egg whites
1/3 cup milk

Frosting
3 cups confectioner's sugar
1 stick butter
3 T kahlua
1/2 tsp vanilla extract
1 drop gel food coloring


Mix the flour, salt, baking soda and baking powder in a bowl and set aside.  In a second bowl, whisk together the kahlua and the coffee.  Beat the butter and sugar in the basin of your stand mixer until smooth, for a couple minutes.  Add the egg whites and combine one at a time.  Alternatively add the milk, flour and kahlua mixture and beat until combined.  Scoop batter into lined silicon cupcakes anbd fill 3/4 of the way to the top.  Bake at 350 for 25 minutes until a toothpick comes out clean.

Beat together the ingredients for the frosting and pipe on the cupcakes using a frosting bag.

Thursday, December 8, 2011

Sasha's Kitchen: Hawaiian Short Ribs


I've made short ribs twice in the past couple weeks.  Both times I made boneless beef short ribs using a lean cut of meat.  The first time, I used Thomas Keller's recipe from Ad Hoc at Home.  I liked the Ad hoc short ribs - they were good and braised nicely using his braised short ribs recipe, but I wasn't fully impressed with the flavors.  I found another recipe for Hawaiian short ribs in Martha Stewart's Everyday Food.  It was a very simple recipe that left the short ribs with a great Hawaii inspired flavor, which I adapted for my tastes, using an oven rather than a slow cooker.  I love visiting Hawaii and enjoy most Hawaiian inspired cuisine so this was a new favorite.

 Hawaiian Short Ribs with Pineapple
1 large red onion cut into wedges
4 cloves garlic, diced
3 tsp ground or diced fresh ginger
2.5 lbs boneless beef short ribs
1 cup dark brown sugar
1 1/3 cup low sodium soy sauce
6 T rice vinegar
1 1/2 T Sriracha hot sauce
3 cups cubed pineapples
scallions, for serving

Place the onions, ginger, garlic, pineapple, soy sauce, hot sauce and rice vinegar in a large stock pit.  Add the ribs on top and cook at 300 for about three hours, or 350 for about three hours, depending on how much of a rush you are in to get dinner on the table.  Serve the ribs and pineapple (which soaks up the flavors wonderfully) and top with scallions. Enjoy!

Tuesday, December 6, 2011

Sasha's Kitchen: Homemade Shoyu-Chicken Ramen


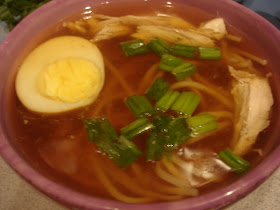
Ramen is the new cupcake.  Well maybe not, but at least in New York, gourmet ramen noodle joints are one of the biggest food trends to hit the city, from Chuko in Brooklyn to Momofuku Noodle Bar.  I've heard great things about Ippudo as well.  I thought I'd give homemade ramen a try.  Initially I considered using David Chang's recipe from Momofuku noodle bar, but I don't cook with pork at home.  I've had a great soy broth and also a great miso broth at Chuko, so I figured I could try devising my own soy-chicken based ramen, or Shoyu, as the Japanese refer to the soy flavor.  I came up with my own recipe that was delicious and had a great Japanese flavor.  I love serving the ramen with the hard boiled (or soft boiled if you prefer) eggs as well. Yum!  Instead of serving in regular soup bowls, since I don't have Japanese ramen bowls, I used large cappuccino mugs from Anthropologie - so cute!


Sasha's Shoyu-Chicken Ramen
1 whole chicken, cut up, about four pounds
1/2 cup of low sodium soy sauce
1 large onion, cut into quarters
4 garlic cloves
4 quarts of water
four small pieces of kombu
2 oz fresh ginger, peeled
soba, lo mein or ramen noodles
3 large soft boiled eggs, soaked for an hour in equal parts soy sauce and mirin
three diced scallions

In a large stockpot, combine the water, chicken, onion, ginger, garlic, soy sauce and kombu.  Bring to a boil and then reduce to a simmer and simmer, partially covered for two hours to allow the broth to get a delicious flavor, just like if you were making chicken stock for matzo ball soup. The when the two hours are up, strain the broth and reserve it of course.  Prior to simmering, but after boiling, you'll want to skim the chicken fat from the top of the broth so the end result will be clear.  Shred some of the chicken for serving in the ramen soup.

Boil the noodles according to package instructions and add to the broth and chicken.  Hard boil three eggs and soak for an hour in a mixture of mirin and soy sauce, and chop up some scallions for serving.  Optional - add some corn or steamed spinach.

Sunday, December 4, 2011

Sasha's Kitchen: Pecan Tassies


Pecan pie is such a big thing this time of year.  I'm more of a fruit pie person but I still like just a bite of pecan pie.  When I was a kid, my stepdad's mom used to make a cookie called pecan tassies (she also made apricot-coconut tassies as well, another recipe I'm itching to try).  Pecan tassies are like mini pecan pies.  You make little crusts in mini muffin tins or molds and fill them with a filling of your choice, in this case, pecan filling.  Bake them and voila - mini bite size pies.  I can't believe I didn't try this sooner.  The possibilities for tassies are endless, or as endless as pies! This brought back a favorite holiday cookie from my childhood.  I used a recipe from my favorite Baked Explorations cookbook, from that fabulous Brooklyn bakery.  It was delicious - a bite of heaven!  This is a true Southern holiday cookie classic.

Pecan Tassies (recipe from Baked Explorations)
Crusts
2 sticks unsalted butter
6 oz cream cheese
1 T sugar
2 cups all purpose flour

Filling
2 large eggs
1 1/2 cups light brown sugar
2 T vanilla extract
1 cup toasted pecans, chopped coarsely


In the basin of your stand mixer, cream together the butter and cream cheese until lump free.  Add the sugar and beat to combine.  Then add the flour one half cup at a time, beating until a dough is just formed.  You could also do this by hand, like when making an old-style pie.  Pinch off walnut sized pieces of dough and roll into balls.  Set aside.  You will get about 40 balls.  Place each ball in a mini muffin tin and use your fingers to press each ball into the sizes of the muffin mold.  I used silicon muffin tins, which make it much easier to get them out when they are done baking. After making the shells, chill in the refrigerator while you prepare the filling.

Make the filling by whisking the two eggs and adding the brown sugar until completely combined.  Add the vanilla and salt and whisk again.  Then add 1/2 a cup of the chopped pecans.  Spoon the filling into the tassie shells and top with the remaining half a cup of chopped pecans.


Bake in an oven preheated to 350 for 15 minutes.  Reduce the oven to 250 and bake another 10-15 minutes until the filling is set.  Allow to cool for thirty minutes before removing from the silicon mini muffin molds.

Thursday, December 1, 2011

Sasha's Kitchen: Mango Salad with Mint Vinaigrette


Mango and mint go together so well.  I love making this salad, which is a simple mango goat cheese salad with a minty vinaigrette, which I have always referred to for some reason as my "mighty mint" vinaigrette.  It has a fresh, mint taste, along with a bit of a tropical aura.  This is an easy salad to make on a weeknight, and is always satisfying.  I've been under some external stressors lately that have been cutting into my cooking energy but this is a meal that's healthy which I can make even when I'm busy dealing with other things. 

Sasha's Mango Salad with Mint Vinaigrette
1 mango, diced
fresh mixed salad greens
pecans, either halves or chopped
4 oz crumbled goat cheese
1/2 cup canola oil
1 tsp meadow honey
2 T diced mint
1 tsp mustard
2 T red wine vinegar

Assemble the salad with the mango, greens, pecans and goat cheese.  Combine the mint, honey, oil, vinegar and mustard for the dressing and shake well. 

Sasha's 

Tuesday, November 29, 2011

Sasha's Kitchen: New Orleans Bread Pudding Souffle with Bourbon Sauce


I took a New Orleans cooking class about six months or so ago at the Brooklyn Kitchen in Williamsburg, and learned a bunch of great New Orleans brunch recipes. I've already made the eggs sardou and beignets at home for my husband (as well as the NOLA creole bloody mary), but last weekend, I finally got around to making the Commander's Palace bread pudding souffle with bourbon sauce, from one of the garden district's famous local brunch spots. The dish is a bit time intensive to make as it has to be made in several stages.  Instead of making a bunch of individual sized bread pudding souffles, I used my large souffle dish to make one giant souffle to share.  It's quite large, so there was certainly a lot of sharing to be done!


Commander's Palace New Orleans Bread Pudding Souffle
Bread pudding
3/4 cups sugar
1 tsp cinnamon
pinch of nutmeg
1/4 tsp salt
3 eggs
 1 cup heavy cream
1 tsp vanilla
5 cups day old french bread or italian bread cut into cubes
1/3 cup raisons
2 T butter

Whiskey sauce
1 1/2 cups heavy cream
 2 tsp cornstarch
2 T cold water
1/3 cup sugar
1/3 cup bourbon

Meringue
9 egg whites
1/4 tsp cream of tartar
1/2 cup sugar

First make the bread pudding.  Preheat the oven to 350 and combine the sugar, spices, and salt in a large bowl.  Beat in the eggs until smooth and work in the heavy cream.  Add the vanilla and then the bread cubes.  Allow the bread to soak up the custard.  Scatter the raisons in a greased square baking pan and top with the mixture.  Cut the butter into small pieces and scatter on top.  Bake 25-30 minutes until golden and firm when a toothpick comes out clean.  It should be moist, not runny or dry.  Let cool to room temperature.

Make the sauce while the pudding is baking.  Bring the cream to a boil.  Combine the cornstarch and water and add to the boiling cream, stirring.  Reduce heat and cook thirty seconds before adding the bourbon and the sugar and stirring.  Allow to cool to room temperature.


Preheat the oven to 350 again and butter six 6 oz ceramic ramekins, or in my case, one large souffle dish.  To make the meringue, put the egg whites in the basin of your mixer and whip with the cream of tartar until frothy.  Gradually add the sugar while whipping on the highest setting and continue whipping until a shiny meringue is formed, and the whites are stiff and stand up.  Break half of the bread pudding into smaller pieces and fold into a quarter of the meringue and put this mixture in each of the ramekins.

Process the remaining bread pudding in the blender until smooth.  I had to do this by hand instead, so it wasn't quite smooth, as my blender decided to die at an in-opportune time.  So my souffle is a bit of a chunkier bread pudding souffle, but it still tasted fantastic.  Fold this mixture into the remaining meringue and top the souffle(s) with the mixture.  Bake the souffles for 20 minutes.  Since mine was one large souffle, it took about 30 minutes instead.  Serve immediately topped with the whiskey sauce.

Saturday, November 26, 2011

Sasha's Kitchen: Turkey Panini with Cranberry-Orange Relish


I made this last week, but if you have leftover turkey from Thanksgiving, this is the perfect leftovers.  I'm obsessed with my panini press. It's one of the best kitchen toys I own and I love buying fresh breads, such as focaccia and making pressed sandwiches, with fabulous meats, cheeses and other spreads.  I've made a couple of good sandwiches the last few weeks, including the one below.  The panini press is like magic - it so quickly flattens your sandwich into a delicious panini and works for almost any sandwich you could imagine.

Sasha's Roast Turkey Panini with Cranberry-Orange Relish and Blue Cheese (makes 2)
1/2 lb sliced roast turkey, or thanksgiving turkey leftovers
1 1/2 cup fresh cranberries
2 T sugar
1 T orange zest
3 T water
fat free mayonnaise
focaccia bread
1/4 lb Stilton blue cheese

For the relish, combine the cranberries, water, sugar and zest in a saucepan and simmer over medium heat, stirring occasionally until the cranberries pop, about five minutes.  Allow to gel together for another minute before removing from the heat.

Cut the focaccia bread and prepare a sandwich with the mayonnaise, turkey, relish and Stilton and press in your panini press according to the manufacturer's instructions.

Tuesday, November 22, 2011

Sasha's & Brad's Kitchen: Tiger Beer and Fish Curry Pairing at Masak


I've never been a big beer drinker, but there are a few kinds of beer that I do enjoy.  One of them has always been Tiger beer, a nice balanced Malaysian beer.  It's one my husband, Brad, more the beer connoisseur than I, has always enjoyed as well.  Recently, I got the opportunity to be treated free of charge to a Tiger beer and fish curry food pairing at Masak, a Singapore-influenced restaurant down in the East Village courtesy of the folks at Tiger Beer.  Coming into the experience, I knew I liked Tiger beer but wasn't sure about the pairing of fishhead curry.  Boy was I surprised.  The curry was delicious and I enjoyed the tender, flaky fish and rice with the homemade Singapore-style curry.  The dish was fantastic and Brad enjoyed it as well.  Just goes to show that it pays to be a bit more adventurous in your eating style!  You just have to be careful of the bones, but the fish was very tender and Masak's curry sauce was delicious.

Delicious fishhead curry at Masak - no need to be afraid, it's super good!

The curry flavors paired well with the smooth, exotic flavor of the Tiger beer.  The beer really brought out the flavor of the curry and it was a truly excellent pairing.  Next time I'll have to try making a curry dish at home and serve it with some Tiger.  In addition to the beer and curry we were treated to, we also purchased a couple of excellent appetizers at Masak as well - we got little Qui Pie Tee (little pastries) filled with hen of the wood mushrooms and duck, as well as the crispy duck croquettes.  All and all this was an exotic and fun drinking and eating experience and an excellent way to enjoy Tiger beer and Malaysian/Singapore-style food!

Qui Pie Tee, filled with hen of the woods mushrooms and duck rilette

Duck fritters, which also paired nicely with the flavors of the Tiger beer

Sunday, November 20, 2011

Sasha's Kitchen: Sesame Chicken with Edamame Coconut Rice


I love making at home styled chinese dishes.  It's so much healthier than actual chinese food, and the sauces are delicious when you make them fresh yourself.  I've invented some of my own recipes, which are basically stir fries, but this one came from Janice's Cole's new book Chicken And Egg, a book of all chicken and egg recipes. I'm happy to report that I'm finally going to be taking another cooking class at the Brooklyn Kitchen, and this one is a chinese dumpling class on December 4th. Should be a lot of fun!

As far as this recipe goes, it's for a stir-fried style sesame chicken.  I made it a second time with beef and it was equally good that was as well. It's a health dish, with a delicious hoisin-based sauce and is as fresh as the vegetables and high quality meat that you use in the dish. The original recipe called for mushrooms as well, but I left that out and added a yellow zucchini instead.


Sesame Chicken with Edamame Coconut Rice
Rice
1 cup jasmine rice
1 14 oz can lite coconut milk
1/4 cup water
1/4 tsp kosher salt
1 cup frozen edamame beans

Sauce
1/4 cup plus 2 T hoisin sauce
1/4 cup plus 2 T orange juice
1 T sesame seeds
2 T soy sauce
1/2 tsp dark sesame oil
1/4 tsp Asian chile hot sauce

Stir Fry
2 T canola oil
1 lb chicken breasts, cut up into 1 inch pieces
2 cups cut up broccoli
1 large onion cut into wedges
1 red bell pepper, cut into one inch pieces
3 garlic cloves, diced
1 T minced ginger
1/4 cup chopped cilantro
1 T sesame seeds
1 yellow zucchini, cut up into slices

To make the rice, put the coconut milk, water and rice and salt in a saucepan.  Stir and bring to a gentle boil, covered, over medium heat.  Reduce to low and simmer for 15 minutes.  Stir in the edamame and cook until the liquid is absorbed and the edamame is tender, about another five minutes.

Combine the ingredients for the sauce and set aside.

Heat half the canola oil in a skillet, wok or stir fry pan. Cook the chicken for 3-5 minutes and set aside.  Add the reaming canola oil and add the broccoli, zucchini onion and bell pepper and cook for about 3 minutes on medium high heat until the vegetables begin to soften.  Add the ginger and garlic to a separate pan and cook for about a minutes before adding to the other vegetables. Stir fry for a few more minutes until all the veggies are crisp-tender. Add the sauce and bring to a boil to coat everything.  Stir in the cilantro and remaining sesame seeds, and serve with a side of the coconut rice.