Friday, December 31, 2010

Sasha's Kitchen: Spiced Pumpkin Doughnut Holes


Sorry for the lack of recent posts - I had set up a few things to post while we were vacationing with the family in Cancun, and haven't had a chance to cook since I got back, although I plane to resume that this weekend. In the meantime, here's wishing everyone a happy new years. I know we all have our new years wishes and dreams that have eluded us in 2010, so here's hoping that all of our wishes come true in 2011. In the meantime, I will share a recipe for pumpkin spice doughnuts for some new years indulgence. I made these about a month ago, after trying another recipe that didn't work out very well. These were delicious, although I recommend cutting the recipe in half, unless you are making them for a party (it definitely made more than 12!). It's not fall anymore, but pumpkin is still good in the winter and these are a great variation on traditional doughnut holes or beignets. I got the recipe from Daily Candy, and it is a winner.

Spiced Pumpkin Doughnut Holes
3 1/2 cups all-purpose flour
4 tsp baking powder
1/2 tsp baking soda
1 tsp salt
2 tsp cinnamon
1 tsp ground ginger
1/2 tsp nutmeg
1 cup granulated sugar
3 tsp butter, room temperature
2 large egg yolks
1 large egg
2 tsp vanilla extract
1/2 cup buttermilk
1 cup pumpkin puree (unsweetened and unspiced)
Canola oil for frying

Combine the flour, baking powder, baking soda, salt and spices in a bowl. With your stand mixer, beat the sugar and butter until smooth, at medium speed. Stream in the buttermilk and beat in the pumpkin puree. Fold in the dry ingredients, blending gently. Chill the dough for three hours. Lightly flour your countertop and cut dough into 1 inch discs - you can knead into doughnut hole shapes, which is what i did. Line two baking sheets with paper towels. Pour the oil into your deep fryer, or tall pot to a depth of about 1 1/2 to 2 inches, or high enough to cover the doughnut holes. Attach a thermometer and heat oil to 365 to 370. Fry the doughnuts until golden brown, about 2-3 minutes. Transfer to the paper towels to drain, using a slotted spoon. Roll in a mixture of confectioner's sugar and cinnamon, and serve warm. Happy New Years!


Share/Save/Bookmark

Sunday, December 26, 2010

Sasha's Kitchen: Spagetti & Meatballs (Variation No. 1)


I love making spaghetti & meatballs. Each time, I like trying out different twists with my tomato sauce, with different results, most of which are pretty delicious.  The sauce I made the other night was definitely a winner thanks to the incorporation of Italian San Marzano tomatoes - the very best kind of canned tomatoes to use in any pasta sauce. I received a can of ShopRite's San Marzano tomatoes and they worked beautifully in my sauce. I hadn't tried making tomato sauce with San Marzano's before, but they are certainly the best - and you definitely want to use genuine imported Italian ones like these. The meatballs are also delicious. I usually don't put artichoke hearts in my sauce, but I did this time since I had received a can of delicious ones from ShopRite as a member of the Potluck Blog Panel.  Eataly in Manhattan is also a great place to buy different imported varieties of San Marzano tomatoes and other Italian foods. I am sure I will share different variations of my pasta sauces in future posts as well. In this sauce, I incorporated carrots, which I love in my homemade marinara sauces - they sweeten up the sauce just a tiny bit and add some delicious texture and flavor.

Sasha's Meatballs
1 lb lean ground beef
one small onion, diced
1/3 cup panko bread crumbs
2 eggs
garlic powder, salt and pepper to taste


Sasha's Marinara Sauce
1 large 24 oz can San Marzano tomatoes
1 14 oz can tomato puree
1 small can of tomato paste
2 cans of water, using the can from the tomato paste to measure
1 T butter or canola oil
1 onion diced
3 cloves of garlic, diced
two handfuls of carrots, diced
4 sprigs of thyme
1 tsp oregano
salt and pepper to taste

To make the meatballs, combine the ingredients above with the meat and form medium sized balls. I hate touching cold raw meat, but these are so good, so I make them anyhow.

For the sauce, saute the onion and garlic in a saute pan with a bit of canola oil for about five minutes over medium heat. Combine with the other ingredients and bring to a boil. Then simmer for about a half an hour until the sauce reaches the desired consistency. In the meantime, bake the meatballs until they are cooked through - about 30 minutes at 350 degrees. Then add to the pot of sauce and allow to simmer for about 20 minutes so that they can absorb the sauce. Serve with a bit of grated parmesan cheese.
Share/Save/Bookmark

Thursday, December 23, 2010

Sasha's Kitchen: Chocolate Gingerbread Shoe Cookies


I'm Jewish so I don't make Christmas cookies. But over Thanksgiving, when I received the new Baked Explorations cookbook as a gift from my mom, I could't resist trying out the chocolate gingerbread cookies, with a bit of a twist. You could certainly make this recipe using regular gingerbread man cookie cutters, sure, but instead I decided to make some fun shoe cookies using my shoe-shaped cookie cutter. The end result looked quite cool as expected, but also tasted delicious. So, these cookies are great for the holidays, but also as a girl's night treat. I also mixed in a few moose shaped cookies as well.

I am in Mexico on vacation right now, so there will be less posts over the holiday. But, never fear because I did set a couple things to post (including this very post) for while I am away. Wishing everyone who reads A Kitchen In Brooklyn all the best for all the things you wish for in 2011!

Baked's Chocolate Ginger Molasses Cookies
3 1/4 cups all purpose flour
1/3 cup unsweetened cocoa powder
1 T ground ginger
2 tsp ground cinnamon
1 tsp ground cloves
1 T baking soda
1/2 tsp baking powder
5 T unsalted butter, softened
1 tsp salt
1/3 cup vegetable shortening
1/2 cup firmly packed dark brown sugar
1 large egg
1/2 cup unsulfured molasses
2 oz bittersweet chocolate, melted

Icing
1 1/4 cups confectioner's sugar
1 large egg white
1 tsp lemon juice


To make the cookies, combine the dry ingredients in a medium bowl. In your stand electric mixer, beat the butter and shortening at medium speed until smooth. Add the sugar and beat until fluffy, for about two minutes.

Add the egg and beat until incorporated. Then, beat in the molasses (which smells horrible all by itself, but don't worry as it will smell great in the end) and melted chocolate. Add the flour mixture in three parts, beating between additions. Divide the dough into three parts and chill for about two hours.

Preheat the oven to 350. Roll out the disks of dough, about 1/4 inch thick (I was lucky to have my mom around, as we made this over thanksgiving so she helped out with this), and cut the dough with your desired cookie cutters - I used a cute pair of shoe cookie cutters. Bake the cookies at 350 for seven minutes until the tops are dry. Allow the cookies to cook for five minutes before transferring to the rack, and allow to cool completely before glazing.

To make the icing, combine the confectioner's sugar, egg white and lemon juice until smooth. Decorate the cookies as desired, either using a brush to glaze or a frosting bag. Enjoy!


Share/Save/Bookmark

Tuesday, December 21, 2010

Sasha's Kitchen: Cinnamon Buns for Sunday Brunch


A week ago for Sunday brunch, I made cinnamon buns. These were a perfect, sweet brunch treat, only to be rivaled by the hazelnut french toast I made the following weekend. I had never made cinnamon buns before, but I was inspired to try it out using a recipe from the new Kosher baking cookbook that I had received to review. It's a terrific cookbook and the cinnamon bun recipe was a winner, and not too difficult to make. If you are making it for brunch, you will want to give yourself a bit of a head start, as it takes a bit of time to let the dough rise, just like with any recipe that uses dry active yeast. These are the perfect way to start your day.


Cinnamon Buns (recipe from Paula Shoyer's the Kosher Baker)
Dough
1 cup soy milk (I used Silk)
1/2 oz (two envelopes) of dry active yeast
1/3 cup plus 1 tsp granulated sugar
4 1/2 cups all purpose flour
2 large eggs
4 T margarine
1/2 cup canola oil

Filling
1 cup (2 sticks) margarine
1 1/2 cups light brown sugar
2 tsp ground cinnamon

You can also glaze with a confectioner's sugar , water and vanilla mixture, but I made them without the glaze, which was also terrific.


To make the dough, heat the soy milk in a microwave until lukewarm. Place in a large bowl and add the yeast and a teaspoon of the sugar and let sit for 10 minutes until the yeast activates and gets all foamy. Add the flour, eggs, remaining sugar, margarine and oil and mix well. I did this in a stand mixer.  I absolutely love making bread and dough because I love the way that activated yeast smells in the kitchen. Place in an oiled bowl and cover with plastic wrap. Allow to rise at room temperature for one hour.

While the dough is rising, make the filling. In a mixer, beat the margarine, cinnamon and brown sugar to make the filling until smooth, again using the electric mixer. Set aside. When the dough is done rising, place the dough on flowered parchment paper and roll into a 15 x 24 inch rectangle. Spread the filling evenly on the dough and roll up the dough into a long log. Use a sharp knife to cut the roll into 1 inch slices, which will be your individual cinnamon buns. Grease a baking sheet with margarine or Pam and bake in an oven heated to 350 for about 25 to 30 minutes, until golden brown.

This is another winning recipe from a great new cookbook that I really have enjoyed.
Share/Save/Bookmark

Saturday, December 18, 2010

Sasha's Kitchen:Manicotti with Arrabbiata Sauce


Pasta dishes make great delicious meals - I was initially going to make stuffed shells using an Arrabbiata pasta sauce, but I couldn't track down jumbo stuffed shells, thus I bought some manicotti noodles instead. This is a healthy pasta dish as well, since I used part skim milk ricotta and part skim milk mozzarella. It is important for a dish like this to use shredded mozzarella, and not the lovely homemade rounds of mozzarella that are so good to eat in other dishes. The flavors here were excellent - and the sauce, which I have refined a bit since I posted my blog post on spagetti all'arrabbiata is a winner. This was a great new pasta dish, and one that I will certainly make again.


Sasha's Manicotti Arrabbiata
1 box of manicotti
3 T olive oil
1 15oz container part-skim milk ricotta cheese
2/3 cups grated parmesan cheese
2 large egg yolks
1 1/2 tablespoons chopped fresh parsley
1/2 tsp chopped fresh mint
1/2 tsp salt
1/4 tsp pepper
3/4 cups shredded mozzarella cheese (part skim)
3 cans stewed tomatoes (15oz cans)
1 onion, diced
3 cloves of garlic
1 pureed roasted red pepper
1/2 tsp red pepper flakes (add more if desired to taste)
1/4 cup panko bread crumbs


To make this dish, lightly oil a 12 by 9 inch lasagna pan. Set aside. Cook the box of manicotti according to the package instructions, or about 4 to 6 minutes, in salted boiling water. They should be slightly firm when done, so be careful not to overcook them, as they will continue cooking later when you bake the dish in the oven. Drain the manicotti.

To prepare the sauce, saute the onions and garlic in the canola oil until they shimmer, about 5 minutes. Then add the pureed red pepper, and mix well. Add the stewed tomatoes and desired amount of red pepper flakes for some heat, and simmer until the sauce has the right consistency. Stir in the panko towards the end.


In a bowl, combine the ricotta, parmesan, egg yolks, parsley, mint, salt and pepper. Fill the manicotti with the cheese mixture, being careful not to tear the manicotti. Arrange the manicotti in the pan and cover with about 1 1/2 to 2 cups of the Arrabbiata sauce. Sprinkle with the mozzarella and bake for about 30 minutes at 350.
Share/Save/Bookmark

Wednesday, December 15, 2010

Sasha's Kitchen: Beef Tenderloin Medallions with Potato Risotto


I haven't had the chance to post yet this week, as I have been busy with my pre-birthday festivities with my husband. But I have plenty of new recipes that I just need the time to write up. This recipe is one that I found on Epicurious. I had bought medallions of petit filet from Fresh Direct because they looked good and were a lot less expensive than Filet Mignon, so certainly worth a try. I was doing some research on the best way to prepare them and came across a recipe for beef tenderloin medallions with a potato risotto and I was intrigued.  I love traditional risottos and thought that making a risotto style dish using potatoes instead of rice/pasta would be a fun and delicious variation. So I decided to give it a try. I seasoned the meat much differently than in the original recipe, so I am including my variations in the write-up below. The original recipe is here, and is from a February 2010 issue of Bon Appetit.

Beef Tenderloin Medallions with Potato Risotto
1 T butter or olive oil
2 cup finely chopped onion
1 lb mini Yukon Gold potatoes, cut into 1/8 inch cubes
1/8 tsp cayenne pepper
1 1/2 cups low sodium chicken stock
1/2 cup heavy whipping cream
1/4 cup grated parmesan cheese
1/4 cup finely diced chives
4 6 oz beef tenderloin steaks
thyme, salt, pepper, rosemary and oregano for seasoning the meat


Melt the butter (or olive oil) in a large sauce pan and add the onion. Cook until translucent, stirring occasionally, for about seven minutes. Add the potato cubes and the pinch of cayenne, while seasoning with salt and pepper. Add the chicken stock, and bring to a boil. Reduce the heat to medium until the potatoes are almost tender. Add more chicken broth if needed, if the potatoes are too dry. Don't add extra though, or you run the risk of over-mushing the potatoes in the risotto. It is a delicate balance! Simmer for about 10 minutes, and then add the cream. Simmer until the potatoes are tender but still hold their shape, stirring often, for about ten minutes. Stir in the chives and parmesan cheese. This can be made ahead of time.


For the medallions, season the steaks with salt, pepper, rosemary, thyme and oregano to taste. Heat some olive oil in your grill pan and cook the steaks until done over medium heat, adding more oil if necessary.
Share/Save/Bookmark

Sunday, December 12, 2010

Sasha's Kitchen: Designer Handbag Cupcakes


Next up in my cupcake series (this might be my last for a bit, as we are going on vacation over the holidays somewhere warm), I decided to do handbag cupcakes. I had thought about this for awhile, and had always considered making small handbags out of fondant or gum paste. However, I wanted to make these a bit more taste-friendly (I always take off the fondant to eat the cupcakes), so instead I decided to make each cupcake look like the front of a designer purse. I had initially planned on using either pipe cleaners or red shoestring licorice to create a handle as well, but couldn't find either in a pinch. I didn't really matter - I think they came out great. I bought some fine tips for my pastry bag so that I could pipe out the icing colors that I made to get detail on the handbags, and I used a tube for the black and red (all the other colors are homemade). And the cupcakes? They are delicious - I made chocolate peanut butter cupcakes with two kinds of frosting - chocolate and plain buttercream (which I dyed every color imaginable with my Ateco  gel food colorings). I will share the recipe below, but first, the cupcakes:

First, I did a couple of different Louis Vuitton styles (also pictured at the top).


Next I did a couple of Chanel cupcakes, which were pretty simple:


The Gucci ones were my favorites:


I did a colorful Birkin bag


And I also did a couple of Fendi ones too:


And now for the recipe - Its from my favorite cupcake book, Julie Hasson's 125 Best Cupcakes, with my own frosting recipes.

Chocolate Peanut Butter Cupcakes (I did 1.5x the recipe below)
3/4 cup all-purpose flour
1/4 cup unsweetened Dutch process cocoa powder
1 1/2 tsp baking powder
pinch of salt
1/2 cup granulated sugar
1/2 cup packed brown sugar
1/4 cup butter, at room temperature
1/2 cup peanut butter
1 egg
1/2 tsp vanilla
2/3 cup milk (I used skim)

First, combine the dry ingredients in a bowl. In the basin of your electric stand mixer, beat the sugars with the butter until smooth and combined, on high for about five minutes. Beat in the peanut butter until smooth. Beat in the egg and vanilla. Then alternatively add and beat in the dry ingredients and the milk. Scoop batter into lined silicon cupcake molds (about 3/4 to the top) and bake for about 25 minutes at 350 until a toothpick comes out clean when you test them.

For my frostings: The chocolate frosting: 1 stick butter, 2 cups confectioner's sugar, 1/3 cup Dutch process cocoa, 1/4 cup heavy cream

Buttercream frosting: 1 stick butter, 2 1/2 cups confectioner's sugar, 2 T heavy cream, 1/2 tsp vanilla extract


Share/Save/Bookmark

Saturday, December 11, 2010

Sasha's Kitchen: Veal with Roasted Red Peppers and Mushrooms


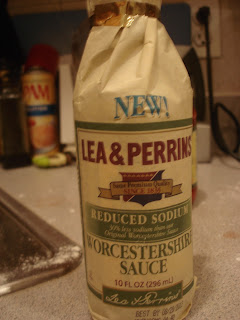
I was excited to use the delicious looking jar of roasted red peppers from Greece that I had received from Shop-Rite in the mail as a participant in the ShopRite "Potluck" blog panel. I had already planned on making veal marsala for dinner. Then, I decided to go with the marsala theme, but vary things up a bit. This dish is kind of a take on veal marsala, but its quite untraditional - and better than even our best veal marsala. I jazzed up the sauce with a bit of lemon and some Lea & Perrins Worcestershire sauce that I got some coupons for as part of a Foodbuzz  promotion. So this is all about some great ways to use the goodies that I received. The roasted peppers from ShopRite in particular were delicious - and made a perfect complement to the marsala sauce and the mushrooms. The Lea & Perrins really jazzed up the marsala sauce in the best way ever - and is a must (in small amounts) in all of my marsala dishes from here on out.  I also used some of ShopRite's extra virgin olive oil that I received - fresh from Italy. It was delicious, and great quality and complemented a nice dish.


Sasha's Veal with Roasted Red Peppers and Mushrooms
flour
1 lb veal scaloppine or veal cutlet
ShopRite extra virgin olive oil
baby bella mushrooms (one package)
1 jar ShopRite roasted red peppers
1 onion, diced
3 sprigs of thyme
1 cup marsala wine
1 cup of chicken stock
juice of half a lemon
1 tsp Lea & Perrins worcestershire sauce


First, dredge the veal in flour and season with salt and pepper. Sear on all sides, and set aside. Dice an onion and saute in olive oil. Add a bit more olive oil, as well as the mushrooms and red peppers and thyme, and cook until softened. Add 1 cup of marsala wine and cook over medium high heat, and allow to reduce by half, as the mushrooms, pepper and onions will soak up the flavor of the marsala. Add the chicken stock and reduce until you have a proper sauce.  In the meantime, you can cook the veal to your liking in the oven before adding it back into the sauce and cooking over medium heat for another few minutes, as the sauce thickens. Add the Lea & Perrins and juice of half of a lemon towards the end. Enjoy!
Share/Save/Bookmark

Thursday, December 9, 2010

Sasha's Kitchen: Asian-Style Sesame Chicken


I wanted to create an Asian-style sesame chicken dish that was lighter than typical chinese food, and healthier - avoiding frying the chicken and using high quality meat and ingredients. As a member of the Shop Rite blog panel, I received a bottle of ShopRite's Asian Style Garlic Sesame Sauce to try out in creating this dish - that was my inspiration. As it turns out, the combination of the high quality Empire kosher chicken and the ShopRite Asian Style Garlic Sesame Sauce was stellar - a healthy and delicious twist on a classic dish. This was a high favorite with my husband, who requested that I make the dish again the next week. ShopRite's sauce would also likely combine well with beef or salmon. I paired the sauce and chicken dish with traditional snow peas and jasmine rice.


Sasha's Asian Style Sesame Chicken
3 T low sodium soy sauce
2 T Sesame Oil
2 T honey
1 package chicken breasts, cut into small pieces
3 scallions, thinly sliced
2-3 cups snow peas
3-4 T ShopRite Asian Style Garlic Sesame Sauce
1 cup jasmine rice


Combine the soy sauce, sesame oil and honey in a bowl and whisk together. Marinate the chicken for about 30 minutes. Remove the chicken from the marinade and saute in a pan until cooked through with the scallions. Shortly before the chicken is done, add the ShopRite Asian Style Garlic Sesame Sauce and cook to completion. Meanwhile, steam the snow peas and cook a cup of rice to serve with the sesame chicken dish.
Share/Save/Bookmark

Tuesday, December 7, 2010

Amasea's Kitchen in Sun Valley: Two desserts to impress your in-laws


This Thanksgiving, I knew I couldn't do much to help the meal planning.

We were planning to arrive the day before the big feast, and it turned out weather delayed us until the morning of -- not to mention the turkey and sides have been traditionally taken care of by my new in-laws, and I didn't want to step on anyone's toes.

However, I had some beautiful, hand-picked cranberries (from my mom, plucked from the cranberry bogs of Whidbey Island) that I really wanted to do something impressive with. I also had just found a recipe that has a slightly embarrassing origin but is *delicious* (more on that in a second).
So, dessert.

I started with that recipe, which comes from Relish magazine. Yes, the food equivalent of Parade. Which is where the embarrassment comes in. As a newspaper employee, I try to read a lot of the paper (classifieds and sports section aside), including Parade and Relish, despite their broad, broad appeal to midAmerica and its bland tastes. Fortunately, Relish is a little better than Parade at breaking those strictures, so occasionally I'm interested in something they print. Like this:

Pear Frangipane:

It. Is. Delicious.

Pear-y, marzipan-y, even good as two-week-old leftovers (says the baker who admits to eating the last piece from the trial batch two days ago). I initially made it with a cake pan, the kind that has the little bar you move under the cake to loosen it after it has baked, and that was OK, but the one I made in the tart pan with the removable bottom was pretty much the star of the show (I do recommend that you fold the edges of the pastry over the top edges of the pan; otherwise, during prebaking it shrinks in too much). My father-in-law requested -- nay, insisted -- I leave the leftovers with him.

So that was one successful dessert, but it hadn't taken care of the amazing, tiny, tart cranberries.
For that, I turned to the intertubes.

I'm honestly not much of a baker. I've gotten into bread moods, and even received the very good Bread Alone cookbook as a gift (though not used it nearly as much as I'd like to). I'm still intimidated by baking and its precision.
Therefore, it shouldn't come as a surprise that I've never made a cheesecake in my adult life. But that didn't stop me from thinking that cranberry would be a good combination with cheesecake (that is, after I rejected the implausibility of traveling with and/or making in small portions and without a reliably available oven, cranberry creme brulee. I still *need* to make that).

And the good old intertubes came through again, giving me this recipe, which AllRecipes.com apparently purloined from Taste of Home.
It's really good. Really full of cream cheese, and really good.

I used a little less sugar and a little more lemon juice because I wanted the tartness of the cranberry to shine. Additionally, the sides of the pan were so low (do I have the wrong kind of pan?) that I had to swirl the cranberry directly into the cheesecake, not leaving the layer of sauce on top that is shown in the AllRecipes photo. It looked pretty awesome, although the cheesecake did crack, which I had understood the sitting in a cooling oven is supposed to prevent.
As it turned out, it tasted pretty awesome too, a run for the money with the pear frangipane.

So. If you have in-laws, bosses, or other discriminating folks to impress this holiday season, these two desserts are what I suggest. If you're so lucky as to be stuck with the last course, that is!
Share/Save/Bookmark

Sunday, December 5, 2010

Sasha's Kitchen: Star Wars Themed Cupcake Series


It was nice for a new cupcake series. I'm not really a big Star Wars or Science Fiction fan, but I have certainly seen the classic movies, and thought they would translate well into a good series of cupcakes, made using fondant from New York Cake. Rather than buy a bunch of different colors of fondant, I bought plain white fondant, and used gel food coloring to make different colors of fondant. I didn't do all the characters, but I did the important ones and/or the ones I thought I could pull off: Princess Leia, Yoda, Jabba the Hut, Strormtrooper, Darth Vader, C3PO and R2D2. The cupcakes are just plain vanilla cupcakes that I made using the recipe from Julie Hasson's 125 Best Cupcakes. I frosted them with yellow/gold icing and added the fondant creations atop. Here are some pictures below:


Share/Save/Bookmark
Related Posts with Thumbnails Share